Tuesday, March 31, 2015

Door - A Poem About Moving On

This is a poem I wrote a long time ago, I couldn't remember when. But it seems that it was written when I was brokenhearted, lol. So possibly in 2009 or 2011. Here it is.


DOOR

I sure do understand the need for closure
But you could have done better than slam the door
Now I'm left inside wondering 'bout what you did
Among this triangle's corners, I'm just the hurting third

Afraid to get burned, I never played with fire
Where does this smoke come from, it's blurring my sight
Raging inferno, the room's dancing in flames
Door's locked from the outside, I called out your name

I didn't see a clear path to a backdoor
Confusion blocks my instinct for survival
Through the slit beneath, I hear your footsteps fade
Busy pounding hard on the door, I couldn't see the other way

We could have left here together and walked away
To different directions, go our separate ways
Did you intend to lock me up or I'm just slow
Or I just don't wanna move on, I'm not sure anymore

I refused to see the path to a backdoor
Hope and fear fight my instinct for survival
And I heard you say now's the time to let go
This door's not just for closure but a wall to separate us... now I know

You're on the other side, you turned to leave the past
It's finally clear to me now that the fire's out
I'm counting every step, fighting the urge to go back
Leaving a trail of teardrops, I hope the rain would wash out

Read More »

Saturday, March 28, 2015

Mickey Mouse Inspired Crochet Necklace


My Mickey Mouse Inspired Necklace
My little girl loves Disney Junior. In fact, that's the only channel we are tuned in to when she's awake, even when she's busy playing with her toys. She likes Mickey Mouse Clubhouse the most, specially Mickey's introduction, the opening theme, and the Hotdog song. So, the obvious choice for her first birthday party's theme is Mickey Mouse Clubhouse. And Jordana as Minnie.


I just wanna share it because she's so adorable, okay, I'm her mom, I wouldn't say otherwise, and for me, all babies are adorable. 

Moving on. So, this birthday party and watching too much Disney inspired me to make some Mickey stuff, I made her a beanie and I made myself this necklace. I'm still young at heart, and a lot of people from all ages love Mickey Mouse anyway.

I was so excited to finish my necklace that I forgot to take pictures while I was making it. Anyway, it's easy to make as long as you have the basic knowledge in crochet. I used 1.50mm crochet hook and cotton crochet thread. 

To make the tube necklace, using the black thread first, I started with a magic ring, 12 single crochet stitches on the first row and continued with single crochet in each stitch working in spirals. There's no need for counting the rows and stitches. I stuffed the tube, as I go, with fiberfill.  I changed the thread to red when the tube was a little over a quarter of my desired length, I wanted the red part to be a little bit on the right side. I also kept on trying it on my neck as I continue just to check how it would feel and look like, I don't want it to be too much of a choker. When the red part was about 4 inches long, I changed the thread back to black until the end of the tube. The necklace is 18.5 inches long. I crocheted a button hole at the end and I just sewed a mushroom button on the other end .


I used two strands of crochet thread in making the circles for them to be stiffer. I just crocheted, with black thread, one circle with 1.8 inches diameter, two 1.3 inches circles for the ears and, with white thread, two half inch circles. I sewed seed beads on the whole surface of each circle. I attached the ears on the side of the big circle by sewing then sewed the big circle and the two white circles to the red part of the necklace.


This is how it looks like when worn. I think it's really cute and would be a nice gift for Mickey fans. This one is for me but I'll see if I can make other designs soon and list them on my online shop. 

I think it's fun making accessories inspired by our favorite characters. I hope you like this post. Thanks for stopping by! See ya real soon! (In Mickey's voice, lol.)


Read More »

Wednesday, March 25, 2015

Make and Decorate Your Own Letter Standee


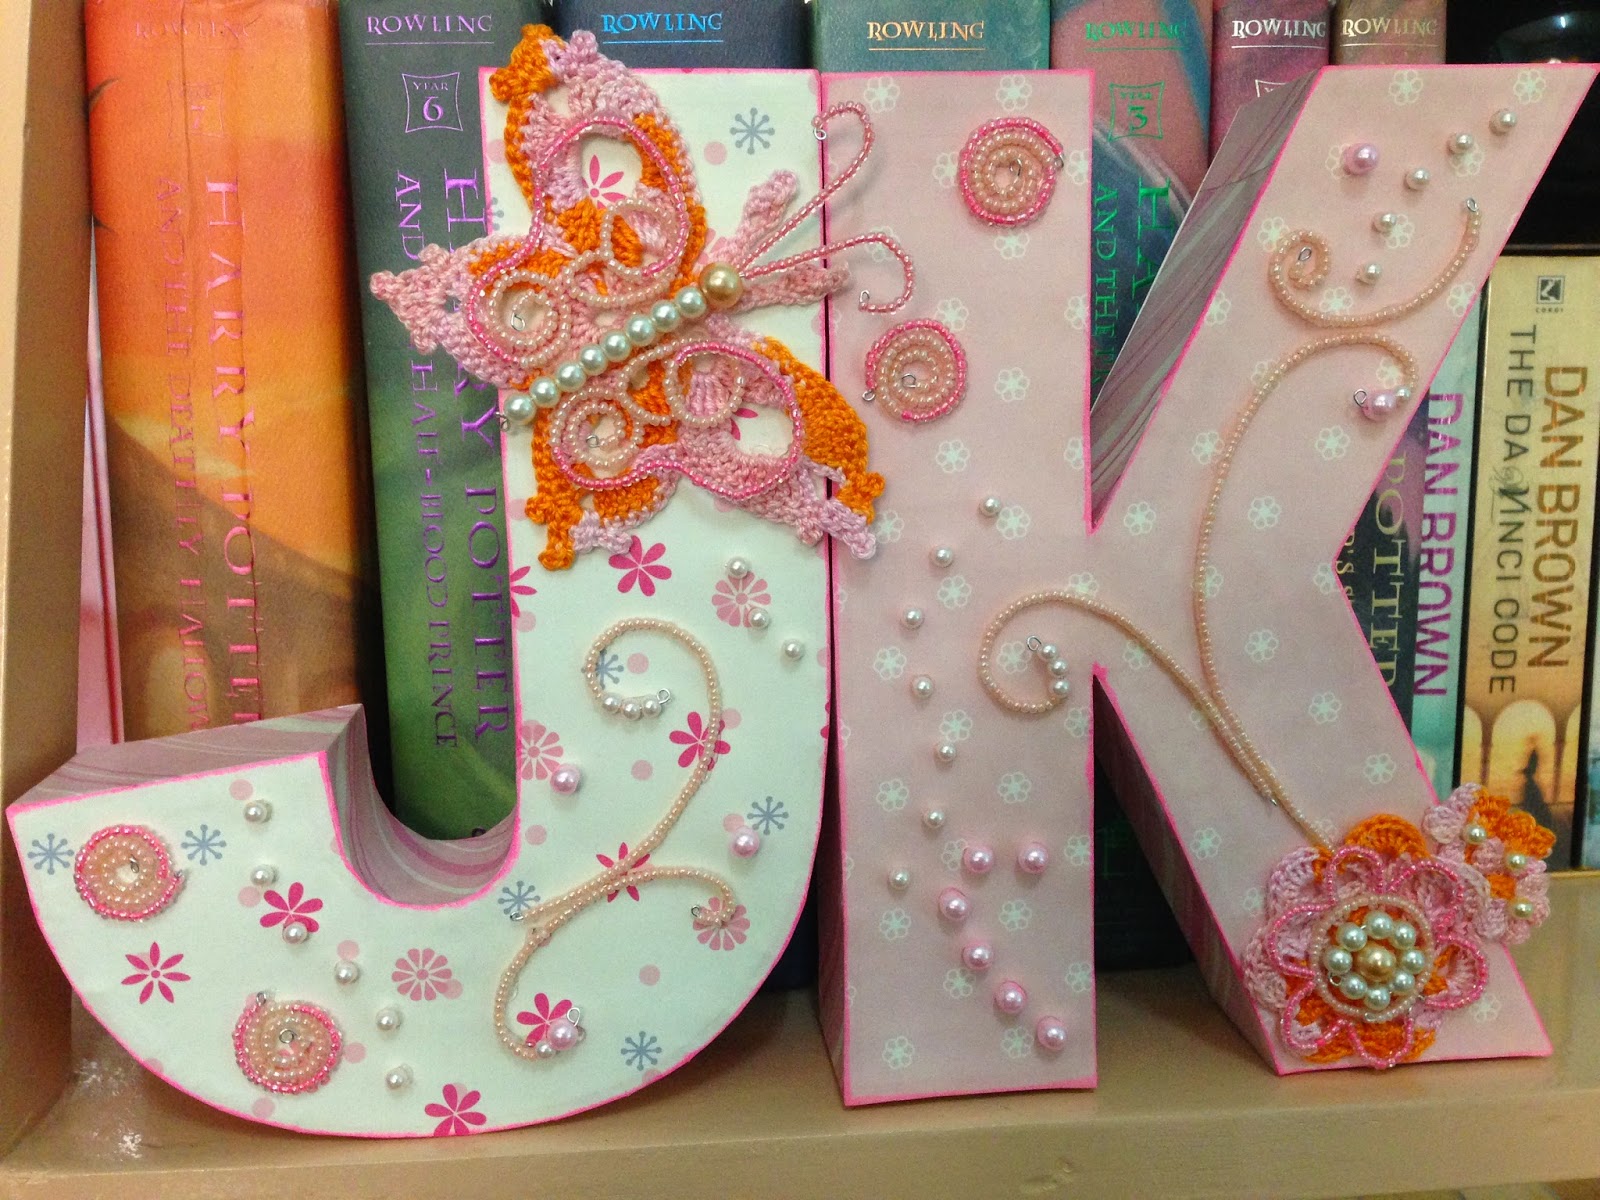
Letter standees are "a thing" these days. From wedding and birthday party decorations to kids' room and nightstand display, they add charm and cool vibe to the place. That's why I made these, with my baby's initials, JK. I love how they turned out. The design looks too girly but my baby is a girl and pink is kind of the official color for little girls. 

I've seen a lot of these for sale that are ready to be decorated but I always missed buying one. Besides, I thought that it would be better to make one myself so I can choose the font and size I want. Now, let me show you how I made my custom letters.


I started with choosing a font. I was thinking of a curvy font at first, but I decided to choose a simple one and to just overdecorate it later. 


The next step would have been easier if I have a printer working, too bad, I haven't got a new ink cartridge still. So, I just traced the letter on the laptop monitor. After cutting it from the paper, I used it to draw out the letter on the cereal box. You may use any cardboard box for this, as long as it's sturdy for the project.


I made two letter Js, the one for the back is a mirror image.


I cut a width of 1.5 inches of cardboard for the sides, this would be the thickness of the letter. Next is to attach it in between the cut out Js. To attach this, you can tape the side around the letter using a masking tape. Again, unfortunately, I have to do the long way because I don't have a masking tape on hand. I used hot glue on this process because it dries instantly.


I cut strips of cardboard, scored and folded it, and glued to the side of the letter J that would go inside.


I then glued the side to those strips.


This time, I glued the folded strips on the sides so I could just glue the other letter J on top. If you want to make your letter standee heavier, you can put in crumpled paper inside before you close it.


To make it sturdier, I cut small strips of paper and paste them on the letter, like doing paper mache. Only, I used a mixture of water and white glue instead of paper mache paste. If you want the letter thicker or heavier, paper mache paste is better, I think.


I did two layers of the paper strips and glue. It's now finished and ready to be decorated. You can choose to paint it to cover the whole letter. What I did is use scrapbook paper to cover it and decorate.


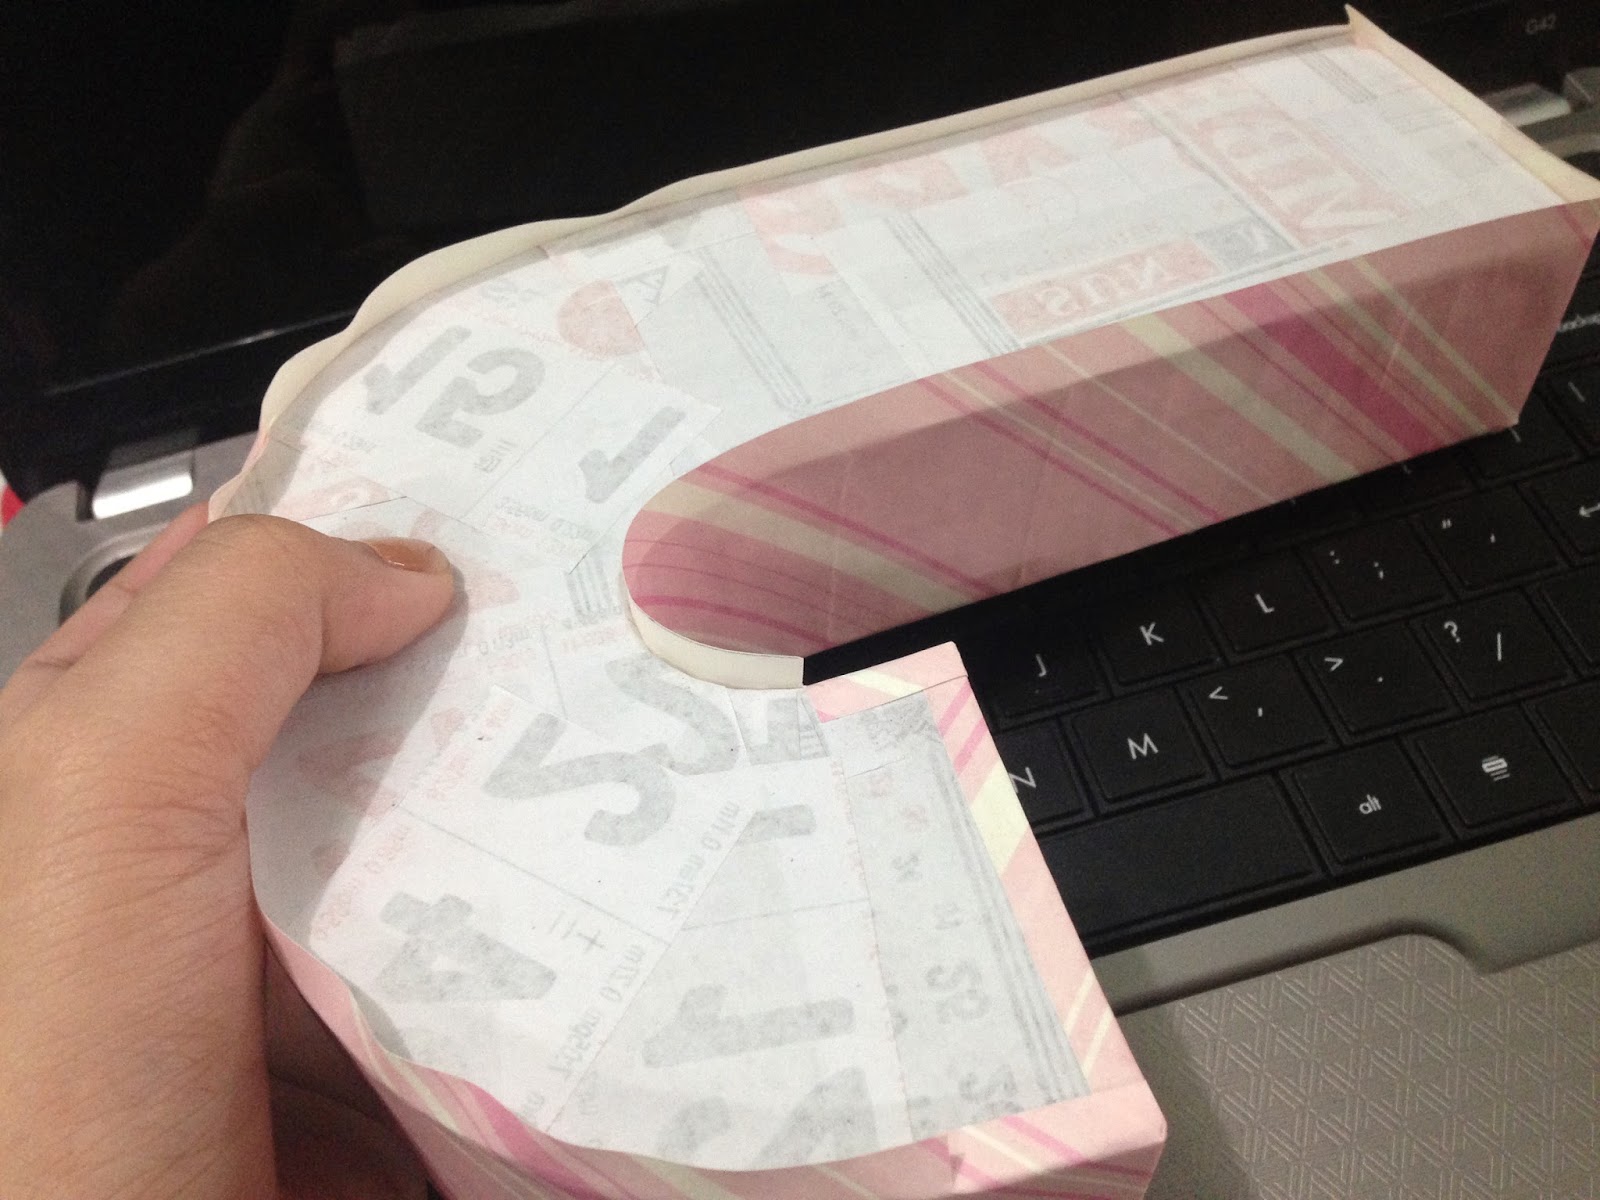
I cut the piece that will cover the sides first. My letter is 1.5 inches thick, I cut the paper into 2 inches wide to make it a little bit wider so it can be folded to the front and back a little.


Then, I drew the letter J and a mirror image of it on the paper, for the front and the back, cut it and glued it on.


I used a stamp pad on the edges to make some distressed effect. The wrapping is done. If you want a cute and simple letter, it's already good as it is like that, but I was in the mood for overdecorating so I decided to add more stuff.


I crocheted a butterfly and a flower, and applied the water and glue mixture to stiffen them.


I also made these simple wire and beads embellishments to add sparkle.


I arranged the items on the letter first and finalized where I want to stick them on, and when I was already sure that it's where I wanted each one to be, I put them on the letter permanently using hot glue.


Ta-da! My very own letter standees. The letter J couldn't stand alone so I taped it to K. So if your letter is curvy like C or O, make the bottom a little straighter or put something heavy inside the letter to make it stand and stay in place.

That's it. Thanks for reading!


Read More »

Saturday, March 21, 2015

How to Make a Colorful Round Braided Crochet Bracelet

Here's another crochet project I just made earlier. I used shades of yellow and green for a lighter vibe fit for summer. Yes, it's summertime here in the Philippines, hot, hot, hot.


This is a round braid using four strands of flat crocheted cord. So first, I needed to crochet flat cords. I used cotton crochet thread and 1.40mm hook. This is the simple process:


Chain 2.


Single crochet on the second chain from the hook.


Chain 1.


Turn.


Repeat single crochet, chain 1, turn, until you reach your desired length. I made my cords up to 7.5 inches, with this crochet thread and hook size, the width ended up approximately 4mm.


These are the finished 4 flat cords. I left a longer tail on both sides of one cord for stitching later.


With a needle and using the longer tail, I stitched the four cords together.


Now, they're ready to be braided. I started a picture tutorial for braiding but it seems that it's not as good as a video tutorial. Anyway, this video from Beadaholique channel in YouTube was also where I learned four strand braiding. Click this link to check it out.


After I finished braiding, again using a needle and the long tail, I sewed the cords together. The braid's finished length is 6 inches.


On to attaching my findings. I connected an eyepin to each end of the braided cord, secured by tying the tails around the pin. 


I then chose what end caps to use. I tried these cones on but they seem a bit big for a short bracelet so I just made these wire end caps.


I just twisted jewelry wire around the tip of a pen up to the size I needed.


I applied glue on the cord for more secured ends.


I put a small round bead, made a small loop using a round-nose pliers and twisted the eyepin to finish.


Then the jump rings, clasp, and chain links for adjustment. I also added this cute padlock charm.


And here's my round braided crochet bracelet in summery yellow and green.


I also made another one using pink and orange shades, and there will be more to come. I hope you like this cute simple bracelet tutorial. Until next time. Cheers!


Read More »

LinkWithin

Related Posts Plugin for WordPress, Blogger...