Monday, November 30, 2015

DIY Dog ID Tags

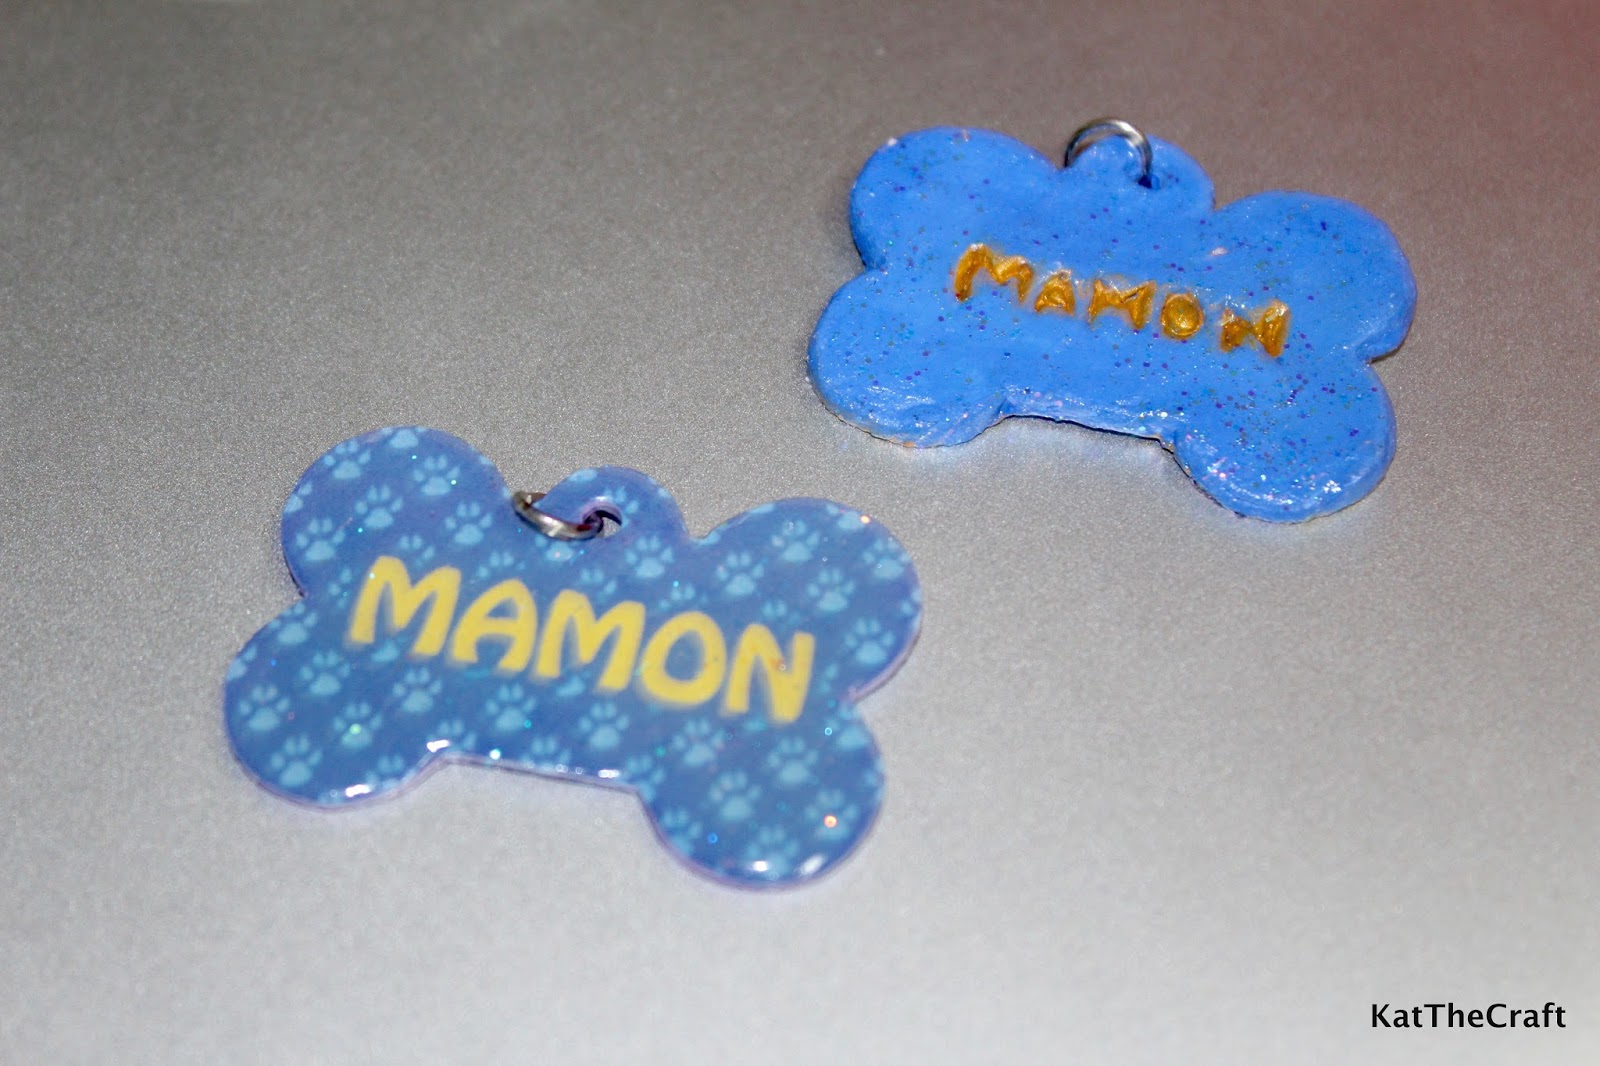
DIY dog ID tags made of card stock and Mod Podge Dimensional Magic and clay.

We recently welcomed Mamon, our Chowchow puppy, to the family. He is now almost three months old. You can read all about our bouncy little ball of fur here

We went shopping for his needs and got to take a look at pet ID tags sold at Pet Express. They look nice and durable, made from imported anodized aluminum and there are colors and shapes you can choose from. They have a free engraving service so you can have your pet's name engraved on the tag and even have your phone number on the back so you can be contacted when your pet accidentally got lost. They have two sizes, I didn't get the dimensions though, one costs Php 450 and the bigger one is Php 500 (a little over $10). I liked the blue bone shape tag and was already about to get it for Mamon then I thought to myself, why not make one? It's not gonna be as durable as the aluminum one but it's definitely gonna be cheaper, well, I won't even spend anymore as the materials of the design I was thinking then were already in my craft stash. If I'm not happy with my finished work, I'll just go back and buy Mamon that cute little tag from Pet Express.

This post will have two parts because I decided to make two different kinds of tags, the first one is made from clay and the other one made with card stock and Mod Podge Dimensional Magic. I'm just gonna call them dog ID tags as they're for our dog and I've chosen the bone shape but you can make this for any pet you have in any shape you want.


Part I - Clay Dog ID Tag


Cut out a template of the shape you want or prepare your clay mold or cutter if you have it in the shape that you want your pet tag to be.


Get your roller or pasta maker and flatten the clay. Just make it into how thick you want it, mine was about 2mm thick. I was afraid that it would crack if I made it too thin as I was only using air dry clay and it cracks sometimes when it dries. If you're using the oven-cured polymer clay, that's good, even better as you can skip painting, you can just choose the color of the clay you'll use. My clay needs painting because it's just plain white, there are only a few brands that make air dry clay in different colors, most just have it in white and terra cotta.


Now, again for this part, you can just use your mold or clay cutter if you have one or use a template like I did and cut out the clay according to the shape. I used a craft knife and a few clay tools to cut and smoothen the clay.


Here, as you can see I tried a few shapes.


Then, using your clay sculpting tools, carve the name of your pet and make a hole just big enough for a jump ring to fit into. I'm still not good at this, I guess the names look a bit sloppy, haha. The heart one is for a necklace pendant for my little girl. 

If you're using air drying clay, just leave it in open air until it's completely dry and hard. For polymer clay, don't bake it just yet, skip this part and the next.


Paint the hardened clay, I used acrylic paint on this but I've used water color before and it worked as well.


Let it dry, it usually just takes a few minutes.


I mixed Pearl Ex Pigments with acrylic paint to add shimmer and used the mixture to paint over the carved part. I needed to mix the powder with paint so it won't just rub off from the dry clay.

For polymer clay, you can apply the Pearl Ex Pigment or your other mica powder brand directly on the carved names without the acrylic paint, the powder will stay on the raw clay. When you're done with applying color and shimmer to the name, you can now bake your clay according to the instruction on the packaging.

Apply glaze on the surface and let it dry. I used Mod Podge Sparkle. 

Then, just put some jump rings and it's ready to be attached to your pet's collar. 

Now, onto the next dog ID tag I made.


Part II - Cardboard and Mod Podge Dimensional Magic Dog ID Tag


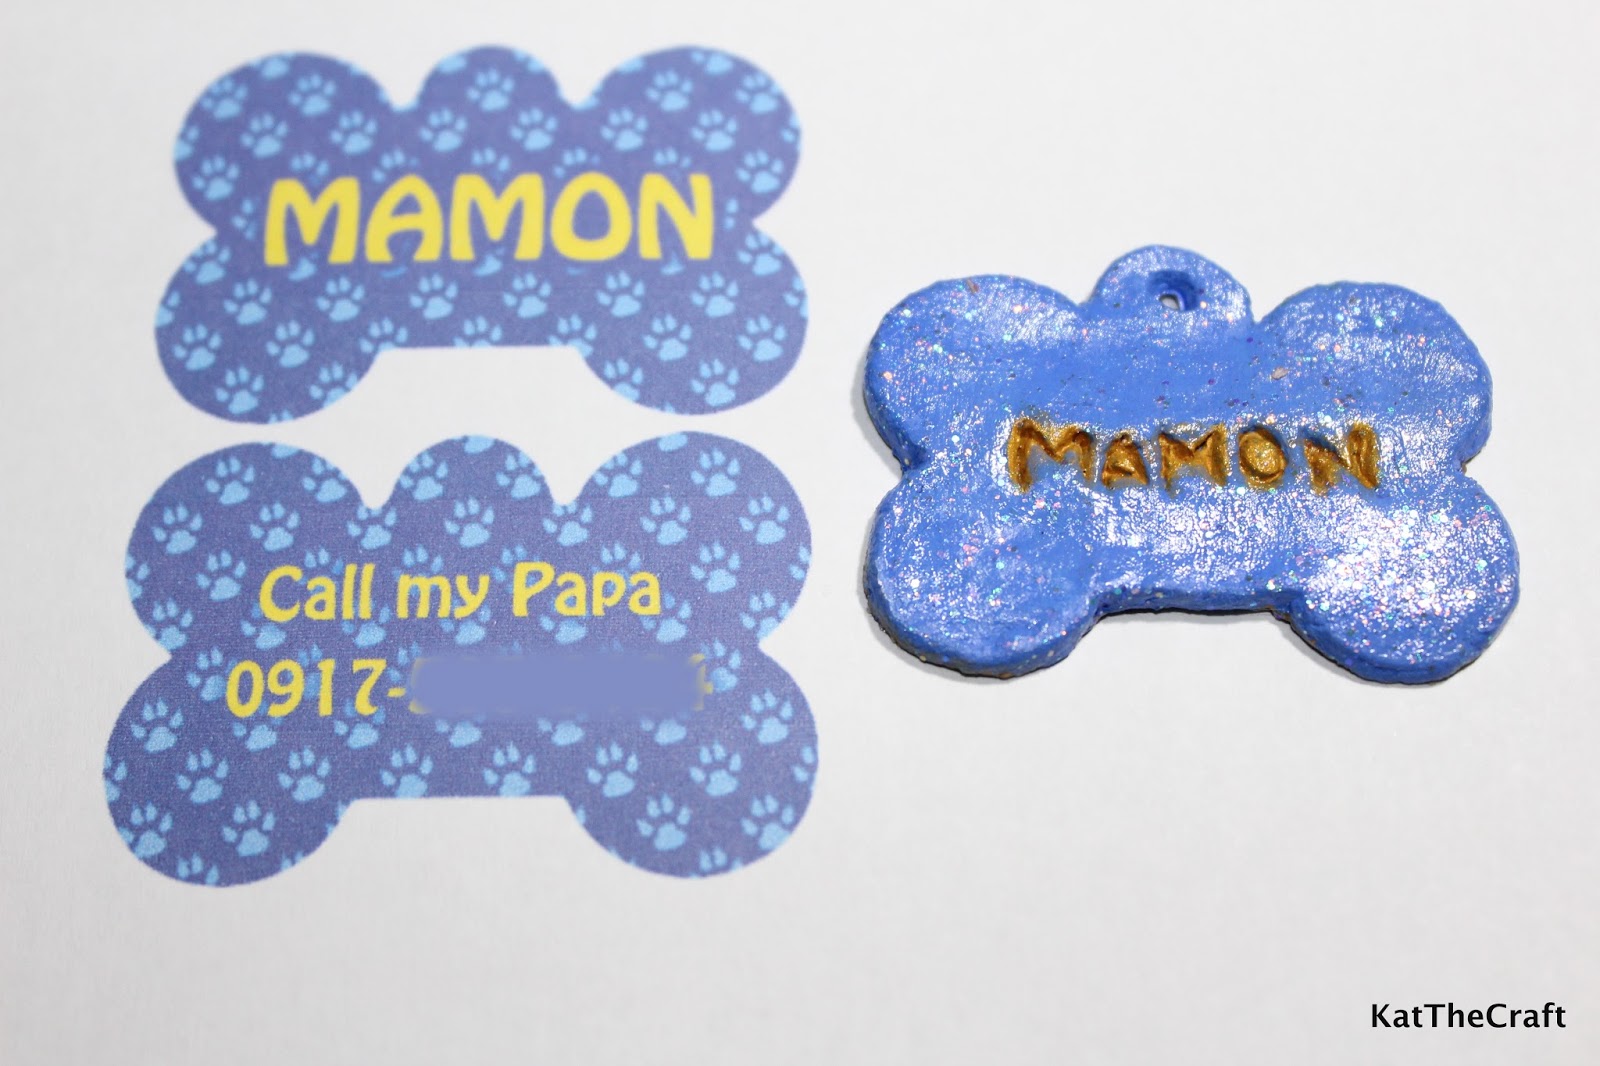
Create a template, the front and back part, and print it out. This was done using Photoshop but you can probably use other apps or softwares. I asked my husband to do it because I'm not good with PS. You can choose other prints for your background or even just a plain one and just make the name of your pet and other details you want to put on the tag clear and visible.


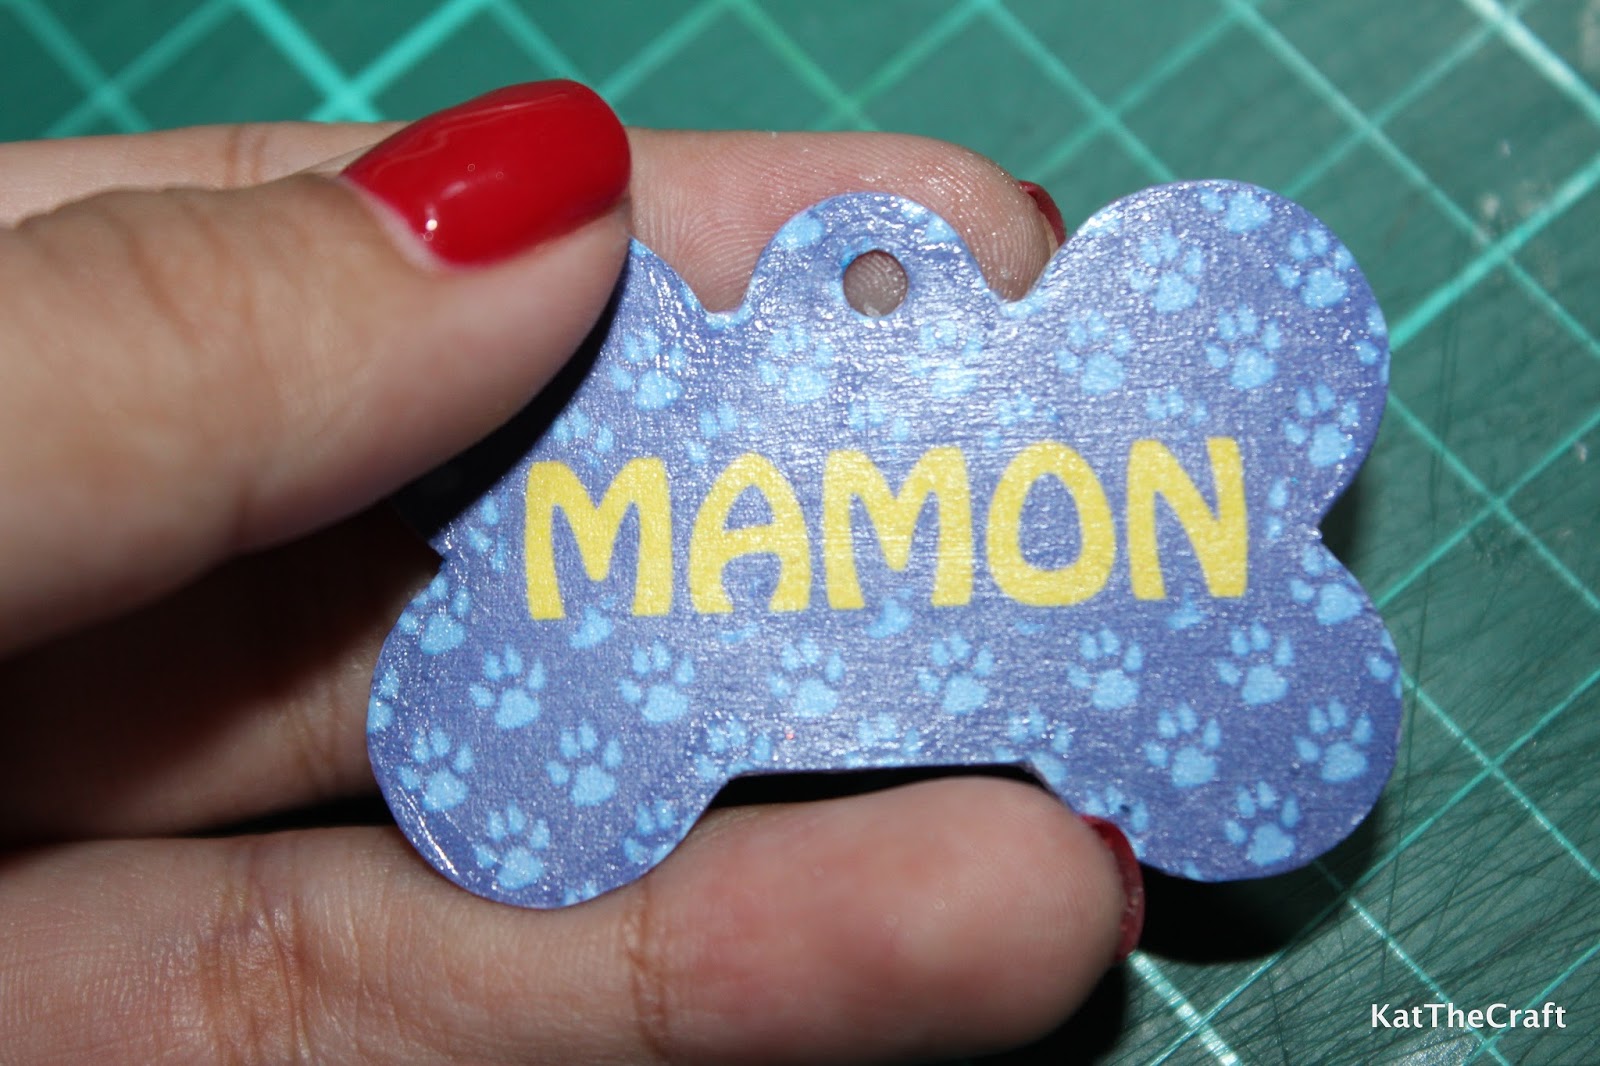
Cut the print out carefully. If your tag has an irregular shape, you can also use a craft knife like I did on the corners of this bone shape.


Get a cardboard that is stiff enough for a dog tag. I used two card stocks glued together, just one sheet was a bit flimsy for this project. Adhere the cut out template on the cardboard. I used my favorite decoupage medium, Mod Podge, but white glue will do, just make sure that it adheres completely on the cardboard and there are no wrinkles. 


Cut the cardboard along the shape of your template.


Then, adhere the back part of the template on the other side of the cardboard.


I applied a thin coat of Mod Podge on both sides. This is just to prepare the surface for the next step though may not be really necessary because I've seen a few projects using Mod Podge Dimensional Magic applied to other surfaces without glaze or sealant first.


This is the Mod Podge Dimensional Magic I was talking about. It gives a clear raised surface like a glass. It's my first time to use this and I find it easy to use.


Fill the surface with Dimensional Magic, it doesn't run so you can apply it up to the very edge. If bubbles appear, just pop them with a pin.


Let it dry for at least three hours. I left it overnight because I really put in a lot so I could have a thick finish. It looks cloudy at first but it clears up as it dries.


Do the same on the other side. When it's completely dry, attach some jump rings,  and connect it to your pet's collar.


Viola! Our fluffy Mamon wearing the dog ID tag I made for him. My husband chose this one over the clay tag. It's been more than a week and it still looks good and when it's already broken and I need to make a new one, I'll be delighted to do so. I'm so happy I decided to make it myself rather than buy. 

Cheers to all pets and pet lovers out there! Bye.


Read More »

Thursday, November 26, 2015

Meet Mamon, the Newest Member of Our Family

It was love at first sight. We didn't plan on getting a puppy as our daughter, Jordana, is still too young to take care of one but when we saw this little guy, Jordana giggled in delight, tried to hug him, held his face in both hands, and said "So cute!" Just like that, we knew we're taking him home. We asked our little girl, "Do you want to buy the puppy?" and she said, "Yes!" Well, she always says yes to a lot of things, but she looked so excited seeing the puppy so we decided to get him.


Meet Mamon, our two-month old Chow-chow. Our little girl's nickname is Monay because she has chubby cheeks that look like monays (bread rolls or buns) so to match her name we thought it's only fitting to name our puppy Mamon (sponge cake) as he also looks like a fluffy mamon.


Mamon and Monay, together, they're Mamonay! They're both so playful but we still need to have a really close watch when they play as Mamon would still bite and scratch when playing, a typical behavior for a young puppy.

We always had dogs, from toy dogs to large breeds, as my brother had a dog buy and sell business and it was hard to get too close to the dogs because they always get sold after a while. The last dog I had, which was really mine, was named Buffy, a Japanese Spitz. I got her when she was only one month old, I was still in college and a friend gave her to me. I had to leave her with my brother after a few years when I was already working because I had to move closer to work and the place I got didn't allow pets. Then after a while my brother for some reason couldn't take care of her anymore and told me that he gave Buffy to a kind couple who treated her like a baby. It was a sad story, until now when I get to think about it, I regret not being able to take better care of her, I feel sad and sorry for her, having to move to a different home twice, but I'm just happy that she found her loving humans. She died of old age, I guess she was 10 or 11 years old then.

I then promised to myself that I will never get another dog until I'm sure that I'll be able to take good care of her or him. I will not move to a place where my pet wouldn't be allowed to stay with me. Now, I'm ready and with my husband who's a dog lover himself, and our little girl Jordana, I'm sure that Mamon will always be loved and well taken care of.

Owning a dog is a big responsibility, I hope everyone knows that. Dogs need vaccines and if you don't want them  to accidentally multiply, have them spayed or neutered. It's heartbreaking to see sick and homeless dogs in the streets. This also goes to cat owners. There's actually a couple of stray cats lurking about in our parking lot, Mamon likes to chase them.

Being a responsible dog owner also means being mindful of the people in your area. You wouldn't want to be awaken by a loud barking or whining, or have your neighbor's dog leaving presents in front of your house, would you? Your neighbors feel the same way so you need to know the reason why your dog is barking or whining and do something about it and when you're walking your dog make sure to bring disposable bags with you for picking up your dog's poop.


Mamon had his second vaccine a few days before we got him and his next one won't be until next month so no vet visit for now. We just took him shopping for a few supplies, his dog food, collar, retractable leash so Jordana can also walk him, potty training spray, potty mat, diapers for when we need to travel, disposable poop bags with dispenser, brushes, shampoo, hair dryer, treats, and chew toy. We got most of them from Pet Express. Good thing we didn't buy him a bed because the temporary one that we prepared for him, a floor pillow, wasn't used at all, he prefers sleeping on the floor instead.


Here he is enjoying his new chew toy. We also gave him another one, a rubber whale from one of Jordana's bath toys, but he would still occasionally nibble on other stuff and when he does, we just distract him and wave his chew toy in front of him until he goes for it.


Look at that, Mamon's first family picture. We already went to Baguio with him and I think he enjoyed the place. We needed to stay in a hotel where pets are allowed and there are only quite a few pet friendly hotels in the city and most were already fully booked as we only decided to go on this trip that same week, luckily there was still an available room at Lindi Hotel where pets are allowed to stay in the room.


Here's another picture, with Ate Manel this time, a relative of mine from the province who stays with us to help around the house. Mamon is close to Ate Manel because he sleeps in her room at night.


When we were strolling in Baguio, a lot of people commented on how cute Mamon is and patted him and at least five people took his pictures.

A lot of things have changed in the house since Mamon's arrival, it's like we have another toddler to take care of and run after. I hope that with Mamon, Jordana will grow up to be a responsible, caring, and loving kid to animals and to everyone else.


"Whoever said that diamonds are a girl's best friend... never had a dog." 


Read More »

Monday, November 23, 2015

Doily Dream Catchers - Wishing You Happy Thoughts and Sweet Dreams


Dream catchers are handmade objects hung near the bed or the place where one sleeps to protect a sleeping person from bad dreams. It is said that bad dreams will be caught in the web and only good dreams will pass through making the person nightmare free through the night. The bad dreams that were trapped will disappear when the sun rises. For its origin, you may want to seek the help of our dear friend Google as I only just looked it up and I must say that it's fascinating. The Native Americans from whose culture this craft originated have a beautiful and spiritual story to tell about dream catchers.

I've also read that nowadays, some people hang dream catchers by a window or a door to make it work like a filtering system so that only positive energy gets inside their homes. Well, wether we believe in it or not, we respect the culture where it came from. It is a fascinating tradition, a superstition if you will, and the thought of giving someone a dream catcher is like wishing them to always have a peace of mind and good dreams, plus, it is decorative.

This design using doily is a modern take on the traditional dream catcher, even the materials used are different. I also tried weaving but I only know the basic style and there are others that are so beautiful and intricate but look really complicated and I couldn't make out the pattern by just scrutinizing it on my own, I need a pattern or a tutorial. Anyway, I love crochet and making doilies for dream catchers would allow me to have various different designs for the web as there are hundreds of patterns available online.

First, you have to gather the materials needed. There are a lot of different materials that you can use to make a dream catcher, a hoop made from cardboard, an embroidery hoop, or a metal ring as a substitute for the wooden hoop, for wrapping the hoop, a leather cord or any ribbon will do, and you can go and have fun with the tails and other decorations, you can use lace, ribbons, charms, beads, or pearls. Well, these are for the modern ones, if you want to have the look of the authentic dream catchers by Native Americans, you may need different materials and do a little research.

Anyway, with my version, the following materials are needed:

Hoop (your choice of size)
Yarn or crochet thread
Lace, ribbon, feather, beads
Glue
Needle
Scissors
Crochet hook


Crochet a doily that would fit on your hoop. You can check out these sites for free patterns, FaveCraftsCrochet Pattern Central, and All Free Crochet. If the pattern would result to a doily bigger than the size of your hoop, you just have to end your work up to the the round that best fit the ring.


This pattern I used calls for several more rows but I stopped at the 5th row because I'm using a small hoop. As an added decoration, I put a bead at the center. Keep in mind that the doily would still stretch so it should be smaller than the inside of the ring to get a nice tension.


Position the doily and attach it to the hoop. I used a tapestry needle to wrap the crochet thread around the hoop and into the spaces in the doily. This thread is only temporary, just to keep the doily in place while I wrap and cover the hoop completely with a different color thread.


Carefully wrap the hoop with yarn or crochet thread, remove the temporary thread as you go along. A lengthy piece of thread is needed to cover the entire hoop and you might not want to thread the needle with the full length at once for it will be hard to work with, just put in about 3 feet each time or the length that you're comfortable with. Glue the start of the thread to the hoop make the rounds and also glue the end, do the same with the next lengths of thread until the hoop is entirely wrapped.

I find it nicer looking when the hoop is completely covered and no wood is showing as much as possible so make each round tight and close to each other. Apply a small dot of glue after every few rounds, this may not be necessary, just an additional trick to secure the thread and keep it in place.


I attached a crocheted chain and had it covered together with the hoop. With my other dream catchers, I attached the strings on top of the covered hoop, so it's your choice, it would look just as nice.


Then, it's time for the tails and decorations. I braided and crocheted a few ribbons, made a tassel, attached a feather to a crocheted chain, and added a little metal charm. But like what I've said, you can use whatever materials you want that you think would make your dream catcher look lovely. Attach your chosen pieces to the hoop


This is the first one I made. I used white and light shades of blue crochet thread. This is a bit small, the hoop is just about a little over 3 inches in diameter.


These are the ones I've finished so far. I'll be making more and probably play with some bold color combinations. I hope to finish about twenty pieces in time for the holidays, I think these will make good Christmas gifts.

These may not be the authentic and traditional dream catchers but my thoughts of giving them to my loved ones have the same purpose, wishing them sweet dreams.

Hope you enjoyed reading. Have a nice day!


Read More »

Friday, November 13, 2015

Mixed Craft Supplies Haul

Whenever you think of shopping online from shops in the US or anywhere abroad, or a loved one would send you a package, what are you excited about buying? Clothes, shoes, bags, makeups, perfumes, or gadgets perhaps? I also love those stuff of course, I would get at least a pair of shoes or two, perfumes, and bags, specially those that cost double here in Manila but along with those ladies' staples, I'm always excited and happy to receive my craft supplies. Most of these craft materials also cost double here as most are only available from individual online sellers and they probably just have their supplies shipped from abroad as well and they still have to add a little amount on top of the item's actual cost and the shipping, it's business, can't blame them, really. 

Anyway, I just want to share these few stuff I got recently for my crafting needs. 


I'm now dabbling with polymer clay so I got this Jacquard Pearl Ex Powdered Pigments set, it's used to add color and shimmer to clay, I also tried mixing it with acrylic paint and the result was great, the mixture shimmered. I also got these tools for clay molding, the stainless spatula set and the acrylic roller. This acrylic paint set can be used with my other craft projects but I got this for my air dry clay, I have plain white air dry clay that can be kneaded with acrylic paint to have color. I still haven't tried it but I'm hoping to get good results.


These are for paper crafts. The Martha Stewart Scoring Board and tool, this is really helpful when making envelopes, paper boxes, or bags, I'm gonna be busy with it this Holiday season. I've already used this Cricut portable trimmer and I loved it, so easy to use and big enough for 12" sized paper or cardboard. Another one from Cricut is this scraper and spatula set, for scraping unwanted stuff from any surface, I'd probably use it with my clay tools, too. I also got this corner rounder set of two, 1" and 1/2", this is for making gift tags and paper bags, so this will be well used this Christmas.


Most of my craft projects use Mod Podge glue and sealer and this is something that should always be present in my craft area, I still have the gloss finish but I also want to try this sparkle one, it's just like the gloss finish but with tiny glitters leaving a nice sparkly look. The Mod Podge Dimensional Magic is a new one for me, I really wanna try it as I've seen beautiful projects using this, it adds glassy finish and dimension to a surface, so cool for making jewelry and accessories, I don't know how to explain what it does exactly but you can check out this tutorial from Mod Podge Rocks to see its wonders.

One of the must-have tools that a crafter needs is a craft knife.  I already have the X-Acto precision knife and just wanted a spare one and a few refill blades but my mom got me this set, I love her, she's so thoughtful.


This lot is for jewelry making that I intend to work on again after the projects I have lined up. I got the ring display hand, the display bust for earrings and necklaces, the magnifier with lamp that can be used hand-held or hands-free, and these assorted pearls and gem stones that are so inviting but like I said I still have some projects to make, mostly for Christmas presents, jewelry making will have to wait.

These are all gifts from my mom, by the way, early Christmas gifts indeed. She got them from Hobby Lobby, Jo-Ann, and Walmart, the pearls and gem stones were from various online stores, the labels show Artbeads.com, Beadaholique.com, Beadalon.com, Jewelrysupply.com, and Firemountaingems.com and some, according to my mom are from trusted eBay sellers.

I still have a lot of supplies I haven't touched yet but I'll get to them real soon and to this new batch as well. It's just sometimes tricky to be in the zone with my crafts while overseeing my two-year old girl, she has a nanny and she can see me from my craft area but she always wants to be with me and join in the fun, haha. 

Till next time. Bye for now!


Read More »

LinkWithin

Related Posts Plugin for WordPress, Blogger...