Showing posts with label bead tree. Show all posts

Monday, March 28, 2016

Mini Beaded Wire Trees as Wedding Souvenirs, Party Favors


I was in the mood for making wire trees last week and I was able to make a few big ones and a lot of small ones. I would be giving away the small ones to my college friends as tokens on our reunion next month. I realized how cute these mini trees are and they would really be great party favors. Just add a customized tag, and voila, you have a unique wedding souvenir or a debut giveaway, another option is to put the trees in acetate boxes complete with ribbons and tags.

To make the tree's branches and leaves, I've shared the process here and the making of clay base here


This time, I used this DAS white air dry clay. Easy to work with and it has a nice finish when it's already dry.


This is how it looks like after drying.


Just a few finishing touches needed here.


I added some pebbles using hot glue.


I put in a generous amount of white glue to secure the pebbles better and so I could add and scatter some beads here and there to give the effect of fallen leaves on the ground.


The white glue dried clear and the pebbles and beads are perfectly visible. I sealed and coated the base, including the bottom, with Mod Podge. And to add a little sparkle, I added a thin coat of Mod Podge Sparkle. I let it dry and it's...


...done!


With bead colors to match your motif and a personalized "Thank you!" tag, you have yourself a nice party favor. I love this black and white one because it's our wedding motif.


Pretty, eh? I've made a few different tags just to see how they would look. The trees are 3 to 4 inches tall, their heights vary because of the differences in the design and form of the branches but they all have the same number of leaves and branches, and same lengths of wire used.

I will make more of these, as samples, when I get the time and let's see if I can get some people to make my creations part of their lovely events. Fingers crossed.

I hope you enjoyed this post. Thanks for dropping by!


Read More »

Saturday, February 21, 2015

How to Make a Beaded Wire Tree


I wrote about buying jewelry making supplies in my last blog post. But instead of making jewelries, my first project from my newly replenished stash was a beaded wire tree. I'm not sure if this thing is already popular here in the Philippines but it is in the US and other countries. My mom was the one who gave me this idea. She's living in the states and she has a very successful ebay business, mostly jewelries, but she started selling wire trees with gem stones about a year ago and they became instant hit. They would go from 50$ to 200$, not just because it's a bit tedious to make but also because she uses high quality materials. She also made some as Christmas gifts and her friends loved them, I did, too, so I wanted to make one myself, but of course, just a cheaper version. So I used what I have on hand, seed beads. And searching online, I found pictures of wire trees also using seed beads, by looking at them closely, I got the idea how I can make my own.


This is my first beaded wire tree.

I want to be really good at this, maybe sell some in the future, so I'd do what I have to do, practice. For those who also want to start making this, there's only a few things you will need, and I hope this picture tutorial could help.

Materials: 

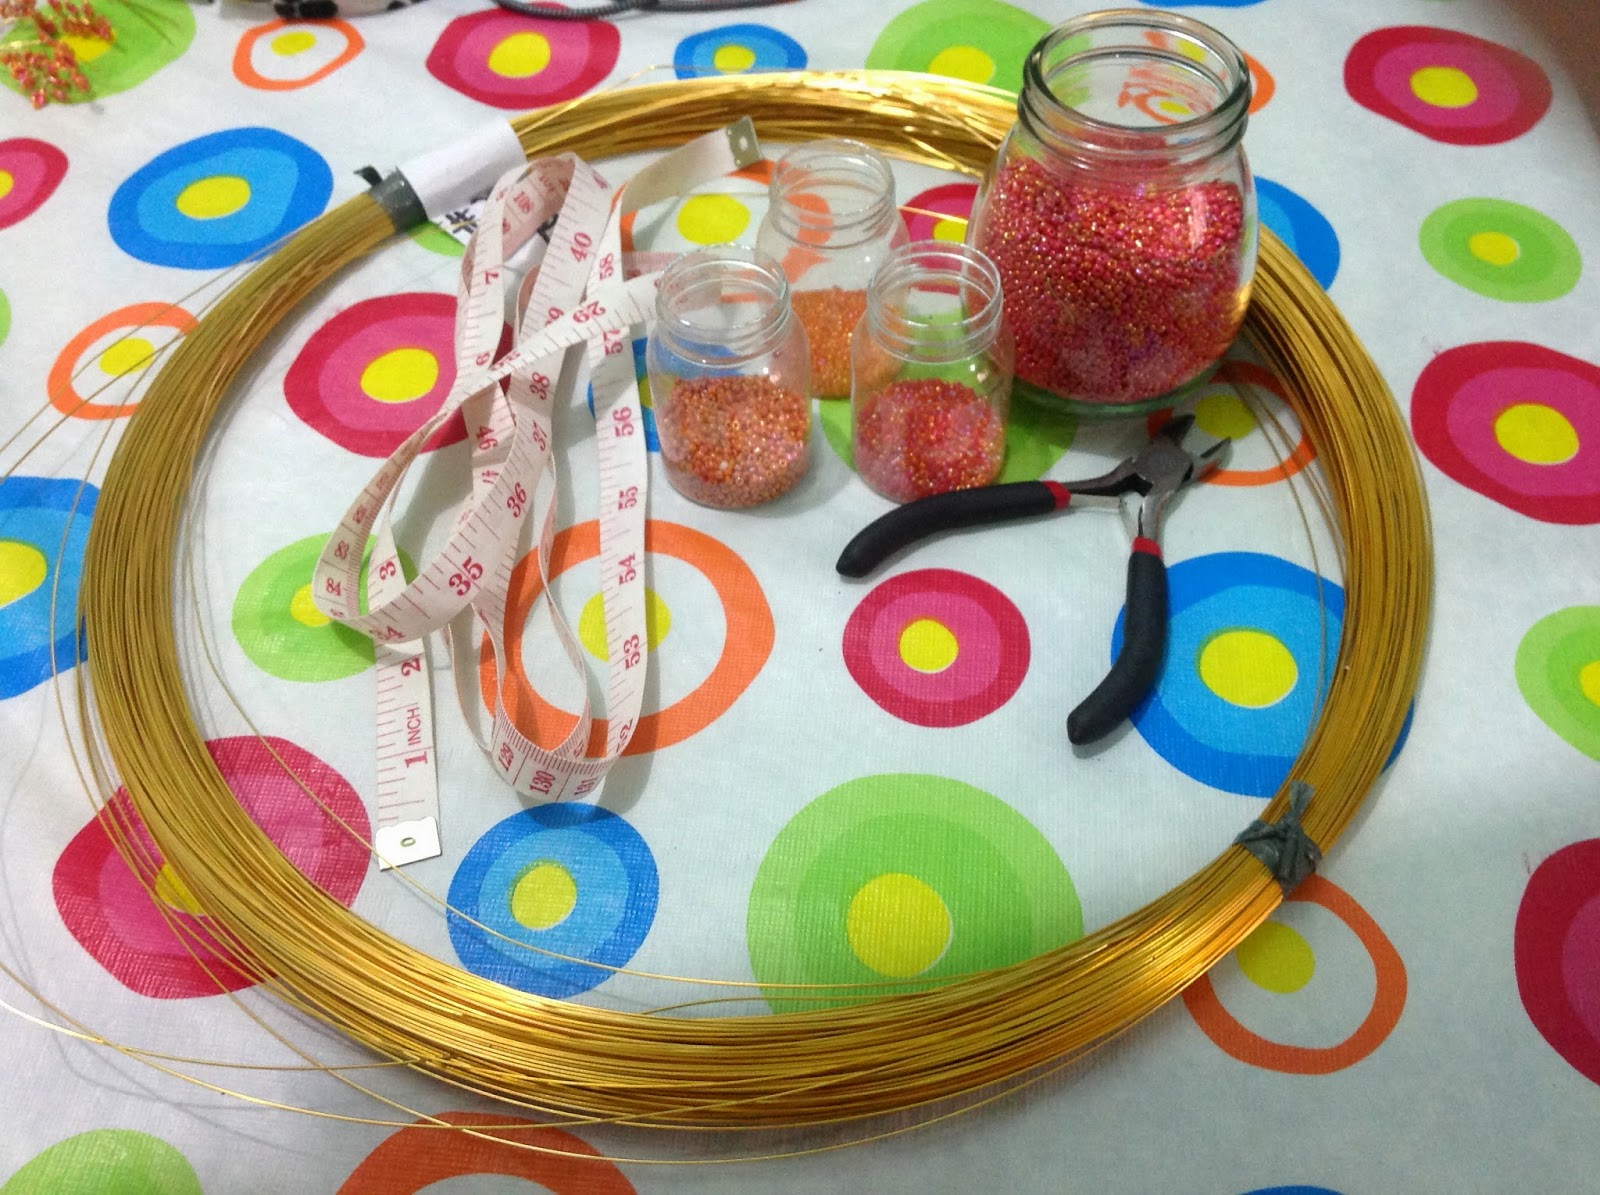
Jewelry wire - I don't know what gauge this is, I just checked if it's easily bendable but not too soft for the weight of the beads. I got this from Wellmanson,
Seed beads - I used 4 different colors because I want an autumn look and I don't have the exact bead color for that. Size is 2mm.
Measuring tape and wire cutter.

For the base of the tree, you can use a rock where you can mount it, a vase, pebbles, or anything that you find nice. With my first one, as shown in the picture above, I just put it on a lid of an ice cream canister (the only thing I could find, then), glued the roots, and put pebbles on top, also, each pebble is glued, too.


Steps:

1. Cut wires of different lengths. I cut my wires from 20 to 25 inches. No particular number for each length, just random, you will just know where to put what along the way.

2 - 3. Bend the wire in half, put on the beads, I put 5 seed beads, and twist into something that resembles a leaf. So that is the center leaf, I just added equal number of leaves for each side so that I would end up with tails at least almost of the same size for the branch.

4. Keep twisting till you reach enough number of leaves for your branch.

5-6. Twist them together to form a group of leaves as shown in the picture.


I made different forms, different number of branches, different number of leaves for each branch, etc., just do whatever you feel that would look good on your project, the goal is to make it look like a tree, and trees have different shapes and sizes, anyway.


 7. Group branches together. I have maybe 7 to 10 branches in each group. (Picture is from a different tree I made, I forgot to take a picture for this step with my autumn tree.)


8. Twist them all together to form the trunk. I want mine to look like a bonsai tree that's why the trunk is short. The height of the gold tree is 4 inches and the autumn tree is about 5 inches. 

Mount it on your chosen base, and you're done. I'm thinking of putting these on something that looks like a bonsai pot, and I still don't have one so I'll just leave it like that for now. 

You can make the tree smaller or taller by cutting the wires to your desired length. 

Hope this helps. I'm just here if you have any question. 


Read More »

LinkWithin

Related Posts Plugin for WordPress, Blogger...