

Hi there! This is another post about a DIY project I made, a cardboard vase and a bunch of tissue paper flowers, an easy project for anyone to make, so feel free to check out how it's done.
The wall art featuring paper orchids I made a while ago inspired me to do this new project. When I was looking for paper flower patterns for that wall art, I saw some pictures of pretty flower bouquets made from different kinds of paper. The tissue paper flowers are the ones I like most because the flowers look soft and delicate. I don't have the type of tissue paper used in gift wrapping in my craft supplies stash, so I decided to make my own version of flowers using bathroom tissue, yes, that's right, just the regular bathroom tissue.
The wall art featuring paper orchids I made a while ago inspired me to do this new project. When I was looking for paper flower patterns for that wall art, I saw some pictures of pretty flower bouquets made from different kinds of paper. The tissue paper flowers are the ones I like most because the flowers look soft and delicate. I don't have the type of tissue paper used in gift wrapping in my craft supplies stash, so I decided to make my own version of flowers using bathroom tissue, yes, that's right, just the regular bathroom tissue.
Before making the bouquet of flowers, I made a vase where I can put it in first. We do have a vase ready but it's transparent which won't do because I don't think the paper stems would look attractive.


I used illustration board to make the vase. I cut 10 pieces of 5 inches by 5 inches board, 2 pieces for each side because I wanted them thick and sturdy. I glued 2 squares together on their wrong side, the black side, then I assembled the box type vase with the use of white glue. After letting it dry, I cut off uneven edges with a craft knife.


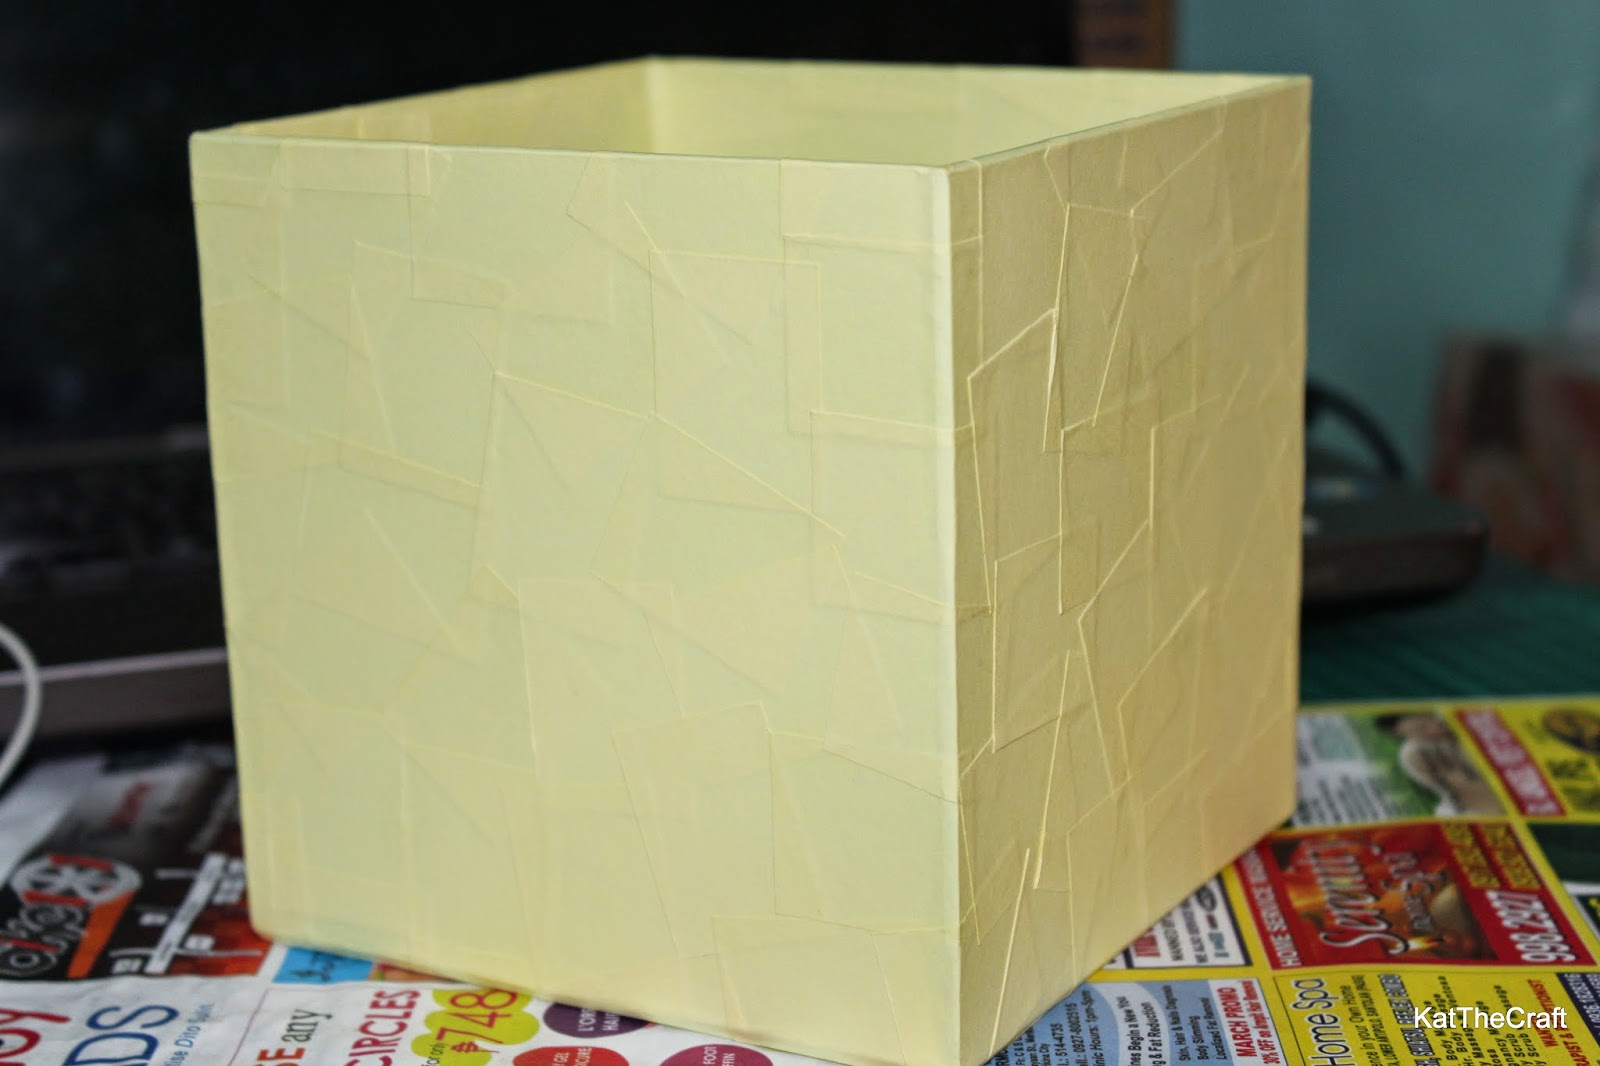
I have this colored paper that's perfect for decoupaging and I chose the canary yellow one, cut it to small pieces, because I want to have that mosaic effect, and adhere them to the box using Mod Podge.


I mixed up a few watercolor shades to get the color I want, just golden yellow, and painted over the colored paper.


This one is unusual, I don't know what I was thinking, haha. I wanted to give it a little luster and I think that mica powder or pearl ex pigments would be great for this but I didn't have any so I tried using my bronzer instead. I applied the bronzer on the lower part using a makeup brush. I was afraid it wouldn't stay like it does on the skin but it did so I was happy with it. I'll just make sure to include mica powder on my things to buy list.

A thin coat of Gloss Mod Podge gave it the look I wanted. Then, it's time to make the flowers.

For the stems, I just cut used copy paper into strips , rolled, and glued them to stay rolled up.


Each flower is made from 5 sheets or panels long of bathroom tissue, ours is 2-ply so the flowers are a bit fluffy looking which is good. I folded the length of the tissue horizontally, rolled around the tip of the stem, and taped it after each round or less so it wouldn't unravel.


I kept making more blooms until there's enough to form a lovely bouquet. I gathered the stems into a bouquet, wrapped them with masking tape, and trimmed the stem ends.


I put the bouquet in the vase, doing some little tweaks here and there, removing and adding flowers in some areas, and it's done. I wanted to spray some color like light pink or blue but I'm afraid it might just ruin the flowers since they're made of bathroom tissue. I tried it on one flower first, it didn't soak the flower but I didn't like the result either, there were like drops of water color, maybe because the sprayer I used sprays out not so fine mists. So I just left my bouquet as it is, pure white.
You can use different materials to make your flowers like crepe paper, gift packaging tissue paper, fabric, and many more. They're simple and easy, all you need are just a few supplies, a bit of your time, and your crafty hands.
Now this is one bouquet that will last for a long time. Have a nice day!
Weird seeing make-up in the mix but it definitely works! Nice! Did you also make the picture frame? Interested akong gawin yun. Hehe.
ReplyDeleteThank you. Ay hindi, binili lang sa SM Store yung picture frame, haha, ang cute eh pink, for only 100 pesos.
DeleteSo cute! Kung gagawa ako nyan for sure ung daughter ko ang gagawa nung flowers. Thanks for sharing mommy kat!
ReplyDeleteThank you. Yup, so easy, kids will enjoy making the flowers.
DeleteGaling! Nice pang mommy-kiddos bonding activity.
ReplyDeleteThank you. True, pwedeng laro laro lang, lagay sa vase or something coz kids like looking at what they made lalo na pag naenjoy nila gawin.
DeleteThis is so cute and it doesn't look like it was made from tissue paper. :)
ReplyDeleteno words, just wow :)
ReplyDeleteThank you!
DeleteClap clap! Galing naman ni mommy! So nice project. I hope I can do this project with my daughter when she gets a little older.
ReplyDeletexoxo
MrsMartinez
Thank you. Tama, pag medyo malaki na, haha, my baby is 18 months old and she loves helping me out on her own way which is of course, manggulo, haha.
DeleteI love it, it's so decorative! :D
ReplyDeleteMake up and paint? And tissue flowers? Ang galing lang! Siguro kailangan lang ng regular dusting hehe. Thanks for sharing! :)
ReplyDeleteTrue, at magkukulay alikabok, just yesterday hinipan ko, may mga lumipad ng dust, haha. Thank you.
DeleteI love it :) Very creative :) have you tried painting the flowers?
ReplyDeleteThank you. I tried spraying it with watercolor but I didn't like the result
DeletePretty flowers! So that's super interesting and looks pretty easy to do... Maybe i'll surprise my husband with a boquet of those on his birthday haha! :)
ReplyDeleteThank you. Yup, so easy to make.
DeleteIt's gorgeous! The flowers don't even look like they're made of bathroom tissue from afar. Love it!
ReplyDeleteAww, thank you.
DeleteThank you. Yes, it is.
ReplyDelete